


How to Clean Your Appliances
Keeping your appliances clean is important. Not just for your own health and safety, but properly cleaning your appliances should keep them running for a long time.

We are often asked about appliance maintenance. Before cleaning any appliances, it's important to reference the use and care guide that ships with every product. This guide will provide you with best cleaning practices, and will also give you useful tools on how to operate your appliances, and in some cases, how to identify service issues should they arise.
Cleaning Your Refrigerator:
Pay close attention to handles, shelves, and bins
Why is this so important?
The refrigerator is the hub for fresh and frozen foods. The average family opens their refrigerator about 50 times per day. So, in addition to making sure the doors are free from smudges, fingerprints, and drips, take extra time to sanitize the refrigerator handles. Did you know most refrigerator shelves and crisper bins are dishwasher-safe? Simply remove your shelves and bins every few months and give the whole refrigerator a good cleaning. Even the most organized household refrigerator could use a wipe-down.
How to clean:
Always reference the use and care guide for best practices. Disinfecting wipes should be fine for most refrigerator handles. If your refrigerator has custom cabinet hardware on it, make sure to do your research for best maintenance practices. Most cleaners are fine on the inside of your fridge as well. Make sure to take extra care if your refrigerator has a metal interior.
Shop Fingerprint-Resistant RefrigeratorsCleaning Your Oven:
Pay special attention to buttons and control knobs.
Why is this so important?
When you’re preparing meals your hands are busy. Whether you’re cracking eggs or breading chicken, it’s so easy for harmful bacteria to travel. Most consumers rely on buttons and knobs to operate your oven or stove. Did you know many new ovens are wi-fi connected so can control them with voice commands from your smart speaker? It’s an easier way to multi-task and keep your appliance controls clean at the same time.
How to clean:
Be extra careful when cleaning your oven controls, especially if they are electronic. Most buttons and handles can be cleaned with disinfecting wipes or household kitchen cleaners. Avoid cleaning solutions with excess water as this can be harmful, especially for electronic controls. Always reference the use and care manual for specific instructions and best practices.
Shop Smart RangesCleaning Your Cooktop:
Pay special attention to gas burner parts
Most gas cooktops and gas ranges look dirty with regular use. Did you know you can clean the parts of your gas cooktop burner? Pay special attention to gas burner caps, cooking grates, burner head slots, and ignition ports.
Why is this so important?
Most people clean the surface of their stove or cooktop but forget to clean the burners and grates. Over time, these parts can get sticky with spillovers and food residue. You might even find that cleaning your burner caps, burner head slots, and ignition ports will improve your gas stove’s performance. With regular cleaning, you can keep your gas burners looking new for years to come.
How to clean:
Always check the use and care manual for tips and best practices. You can soak most grates and caps in warm diluted soapy water. Use a scrub brush to remove any sticky stains and food residue. There are gas grate cleaners out there, make sure to do your research. Cast-iron burner grates and enamel-coated grates respond differently to the various burner cleaners out there. After cleaning, make sure to rinse and dry your cooking grates and caps. To clean the burner head slots wet the burner with warm water and use a toothbrush to remove sticky residue. You can also use a sewing needle or paper clip point to remove any blockages from the ignition port for best cooking performance.
As a side note, if you’re cleaning a gas side burner in your outdoor kitchen or grill, make sure to clean it regularly. Pollen, debris, and insects can clog up the burner and a simple cleaning will get your outdoor gas burner working like new.
Cleaning Your Dishwasher:
Clean the catch filter
Why is this so important?
Most dishwashers sold in the last 10 years are quiet. This is because they have a catch filter at the bottom, instead of a grinding disposal. The dishwasher catch filter is designed to catch food particles and debris from your plates. Filters don’t make noise, unlike grinders, but they require a small step.
How to clean:
Open your dishwasher, pull out the lower rack, and reach into the bottom of your dishwasher. If your dishwasher has a filter, it will be easy to see. With most models, you can twist the filter with your hand, and it should come out. Dump the debris into the trash and rinse the filter under the sink. You should check on your filter every 2-4 weeks depending on use.
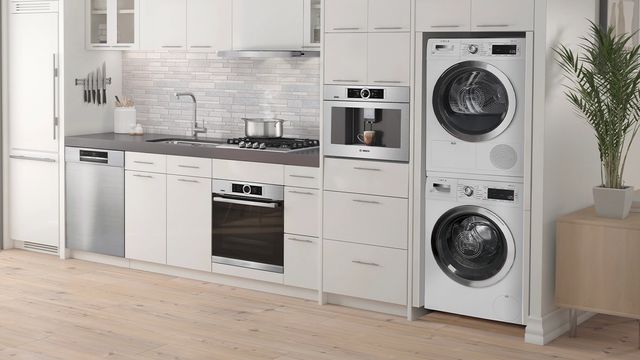
Cleaning Your Washer:
Check and clean the front loading washer gasket
Why is this so important?
Front-loading washers are great for energy efficiency and cleaning, but they require that you regularly check on the gasket. If you use a front-loading washer, you will notice a rubber gasket around the door. This gasket is designed to prevent water from escaping the washer during a cycle, however, it can be a collecting place for water, moisture, soap residue, and in some cases, mold. This can cause your front load washer to have a musty smell.
How to clean:
There are a few things you can do to keep your washer smelling great. Most new washing machines prompt you to run a self-cleaning cycle as needed. This self-cleaning cycle can reduce build-up over time. In addition, with many front loaders, you should leave the door ajar in between cycles so that excess moisture can escape. To take that a step further, many people like to take a microfiber cleaning cloth, kitchen rag, or even paper towels, and wipe the gasket in between cycles to prevent water from pooling. you can also do your part by using less high-efficiency soap to prevent soapy build-up in your machine. Many of the new manufacturers are engineering solutions to address this problem. Select GE, Maytag, and Whirlpool front loaders will bring in air from the outside of the washer to dry out the washer drum and gasket after the cycle is complete.
Cleaning Your Dryer:
Pay special attention to your vent pipe and ductwork
Why is this so important?
Dryers are a common cause of household fires. Many dryer fires start because of excess lint build-up in the ductwork behind the dryer. Lint is very flammable. If you have a vented dryer, it’s really important to make sure that the ductwork connecting your dryer to the outside of your house is free and clear of excess lint. If you are unable to access your vent pipe or ductwork, there are many companies that specialize in maintaining dryer ducts. If you're looking for an alternative, there are many options on the market like condensation and heat pump ventless dryers.
How to clean:
Disconnect your dryer from the ductwork behind the machine. Use a flexible vacuum hose to access the blockage. If you cannot access the blockage, or have difficulty disconnecting the dryer duct, it’s worth hiring a professional to help you with this task.
Cleaning Your Vacuum Cleaner:
Pay special attention to the brush roll
Why is this so important?
A vacuum powerhead has a brush roll inside of it. The brush roll is designed to extract dirt and debris from carpets and area rugs. If you were to inspect your brush roll, you might find some unwanted treasures like long hair, string, or twine that can damage the brush rollover time.
How to clean:
Turn over your vacuum head and look at the brush roll. If you have extra hair and debris in there, the easiest way to remove it is with a scissor. Be careful not to cut the vacuum brush bristles, but you can simply get under the blockage, cut the hair or string, and pull it out of the brush roll. Once you are done with that, you might need to hit a reset button to reactivate the powerhead.
Cleaning Your Grill:
Clean inside your grill cart
Why is this so important?
Grilling is fun, but can also be a bit messy. Make sure to check your grill cart for excess food residue, sauce drippings, and in some cases, spider webs, and critter nests. Keeping a clean grill cart will be a convenient storage space for disposable serving pans, paper plates, and grilling tools.
How to clean:
Sweep out any dirt, residue, and spider webs. I use my grill often, so I tend to sweep out my cart on a weekly basis using a dustpan brush. If your cart is very dirty, you can use soapy water and a scrub brush. Just make sure to reference the use/care guide for your appliance for best practices.
Cleaning Your Coffee Maker:
Regularly clean the milk pipework
Why is this so important? If you are going to invest in a built-in coffee system for your home, it’s critical to run regular self-cleaning cycles. Many high-end coffee systems have milk pipework for lattes, cappuccinos, and other specialty drinks. It is critical to clean this pipework for your health and safety as well as for the appliance. Every time I make a coffee drink for a guest, I run a quick hot water rinse cycle. It’s an extra step but this way I know I’m serving a great cup of coffee.
How to clean:
Many of the best built-in coffee machines will prompt you to run regular cleaning cycles. Some coffee makers require that you add self-cleaning and descaling tablets before running the clean cycle. Make sure to carefully read the cleaning best practices outlined in the coffee maker’s use and care manual.
Cleaning Your Air Conditioner:
Check and clean the filter screen.
Why is this so important?
AC Units have a screen designed to filter impurities from the air. Running an AC with a dirty filter screen can reduce the energy efficiency of the AC unit and in some extreme cases, could spread dust, germs, bacteria, and even mold through the air. It’s a simple task to check and clean most AC filters.
How to clean:
For window and wall AC units, the filter should be easy to find. It’s usually an easy pull-out on the side or front of the unit. With some models, you might need to remove the front face of the AC to access the filter.
With a central AC unit, remove the filter from the air return. Either replace your filter or clean it in the same way you would clean a window/wall AC filter. For best results, you can also vacuum the filter housing with a skinny vacuum nozzle before inserting a newly cleaned filter.
To clean either window, wall, or central AC filters, simply run the filter screen under running water. If needed you can use liquid soap and a soft-bristle brush to clear away any sticky debris. Let your filter dry completely before replacing it.